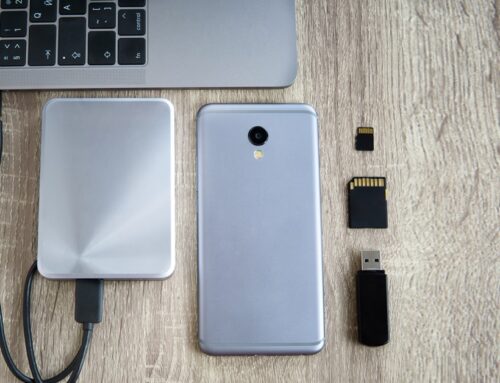
To say that USB devices are ubiquitous is like saying Starbucks is a popular coffee chain. It’s so obvious that we take it for granted. As for USB devices, we use them to transfer data, update firmware, charge our smartphones, and even print from them in some cases. However, with this convenience comes a significant risk, as USB devices can easily infect your network with malware. One solution to this problem is to whitelist authorized USB devices and block all others.
If you’re wondering if whitelisting USB devices is possible, the answer is yes. We’ll tell you how later in this article, but first…
The Inherent Threat of USB Devices
USB devices such as flash drives and external hard drives have become a critical component of any business’s IT infrastructure. However, they can also pose serious security threats. These devices can easily hide malware, opening a gateway for cybercriminals to access sensitive data and infrastructure. Hackers are increasingly using USB devices as a way to breach networks because they can bypass traditional security measures.
For instance, in recent months, SecurityWeek has reported that Russian hackers are infecting USB drives with malware and using them as a vector for attacking the Ukrainian government and military.
While you might not be the Ukrainian government, it is still crucial to ensure that only authorized USB devices are allowed to connect to your network.
Your 9-Step Checklist for Whitelisting USB Devices
The concept of “whitelisting” involves creating a list of approved USB devices that are allowed to connect to a computer or network. This approach adds a layer of protection by blocking all unauthorized devices, which eliminates the risk associated with plugging an unknown USB device into a computer.
Here, then, is a step-by-step guide to whitelisting USB devices.
- Assess the Network Environment: Before implementing USB device whitelisting, it’s important to understand the network environment and the specific requirements for allowing USB devices. Identify the sensitive areas of your network, such as servers or workstations, where USB access needs to be controlled.
- Determine Whitelisting Criteria: Define the criteria for whitelisting USB devices. This may include specific device types, manufacturers, or even unique identifiers such as vendor IDs and product IDs. Consider the needs of your organization and the devices that are required for normal operations.
- Create a List of Authorized Devices: Compile a list of USB devices that are allowed on the network. Gather information about each device, including its make, model, serial number, and any other relevant identifiers. This list will serve as the whitelist of approved USB devices.
- Implement Device Control Software: Install and configure device control software or endpoint protection solution that supports USB device whitelisting. There are various commercial solutions available that can help manage and enforce USB device policies across your network. Choose a solution that fits your organization’s needs.
- Configure USB Whitelisting Policies: Access the device control software and navigate to the USB whitelisting settings. Create a policy that enforces the USB whitelist criteria you defined earlier. This policy should allow only the approved devices to connect while blocking all others.
- Add Approved Devices to the Whitelist: Within the device control software, add the devices from your authorized list to the USB whitelist. This typically involves inputting the device details such as make, model, or unique identifiers. Some solutions may also offer the option to import a CSV file containing the approved device information.
- Test and Fine-Tune the Whitelisting Policy: Once the whitelist is created, test the USB whitelisting policy on a few test machines or a small subset of devices. Ensure that authorized USB devices are allowed to connect, while unauthorized devices are blocked. Fine-tune the policy as needed based on testing results and user feedback.
- Deploy the Whitelisting Policy: Roll out the USB whitelisting policy across the network. Deploy the device control software or distribute the policy configuration to all relevant endpoints. Communicate the policy changes to employees and provide any necessary training or documentation.
- Monitor and Maintain: Regularly monitor the USB device usage on the network and review any device connection attempts that may have been blocked. Update the whitelist as new authorized devices need to be added or remove devices that are no longer in use.
Adding a Layer of Physical Security
Remember, USB device whitelisting is just one aspect of a comprehensive security strategy. It should be complemented by other security measures such as user education, strong access controls, regular system updates to maintain a secure network environment, and – perhaps most important – the use of USB port locks. Port locks are physical devices that block access to USB ports, thus preventing unauthorized devices from being plugged in.
By locking computer ports via port locks, you can rest assured that no unauthorized devices can be connected. This, coupled with whitelisting, offers a two-pronged defensive blockade that will be difficult for any cybercriminal to penetrate.
Big Benefits, Small Costs
The benefits of implementing USB device management policies and USB port locks far outweigh the potential cost of such investments – professional-grade USB port locks are as inexpensive as $4 each.
Whitelisting USB devices and locking ports for approved devices to ensure that no unauthorized device can connect to your network will decrease security risks and make managing USB devices more efficient. We advise all businesses to start implementing these policies to avoid future cybersecurity threats.


